The add-on is a complete tool for converting images, that is why a lot of panels will be closed when you load a new blend file. the panels that are not closed are the only panels you need to make a simple resize or conversion of selected textures.
For this first conversion, please create a new blend file, and load any texture in the default cube (or any object you have in this empty scene).
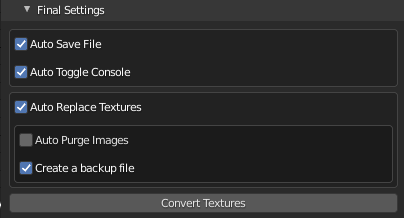
Don’t forget to save this file! the addon needs the file to be saved before any conversion
We can start from the top to the bottom:
1. Select Textures
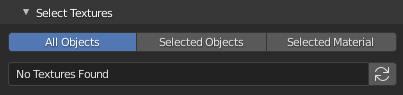
Here is where you will be able to select the textures you want to resize or convert.
All Objects: Will select all textures of objects in your scene
Selected Objects: Will select textures only in selected objects
Selected Material: Will select only textures in the select material (check the “Selected Nodes Only” to convert or resize only textures in selected nodes
For this first conversion, I recommend you to convert textures of the selected material only.
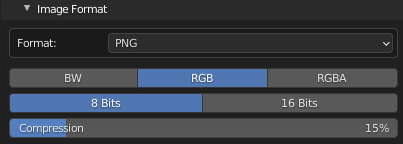
2. Keep Information

Here is where you will be able to select what information of each texture you want to keep, this will be the default setting to make a simple conversion, for now, we just want to change the size and format of each texture.
If you uncheck all options, you will be able to change the color depth, and color channels of each texture (it will depend on the format you chose)
like in this example:
3. Converting Settings
Here you will be able to set the settings of the new textures you want, like the resolution, format, and more
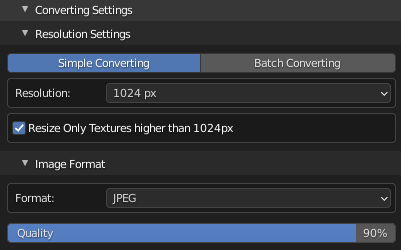
for now just change the resolution and the format you want
And it’s done, just press the “convert textures” button, and wait a little bit. When finished, the textures will be in a folder called “Textures” in the same directory as your blend file.