Now you have learned how to make a simple conversion with FormatSwap, and now you will be learning everything that this addon has to offer.
In the simple converting process, we have ignored some panels and options that are not necessary for converting textures, but it’s there if you need them!
Batch Converting
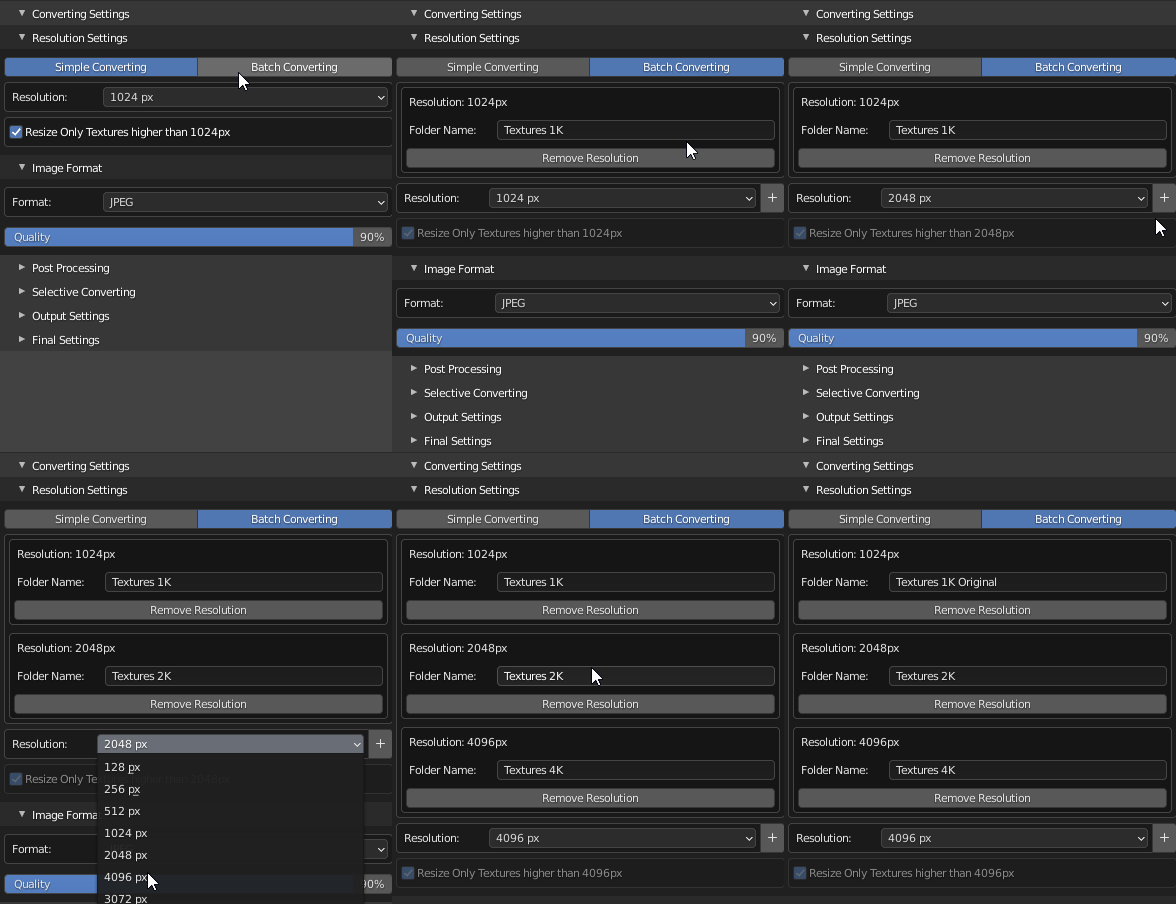
Batch Converting is a very useful feature if you have to convert a texture of one object or asset in different Sizes, all you have to do is to switch to “Batch Converting”, and add the variations of resolution you want in these textures.
Post Processing
Here you will be able to change some properties of the converted textures.
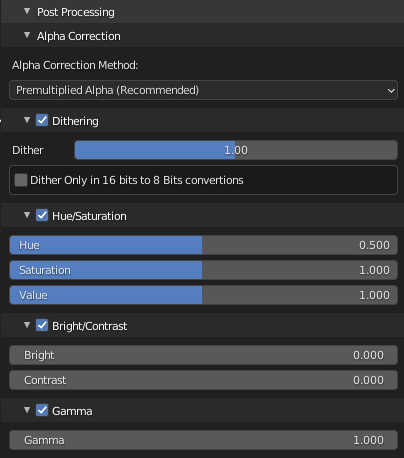
Remember that you can use the addon just to change the color of one texture, you don’t necessarily have to change the size or format, to keep all the information of the original texture, just check all options in the “Keep Information Panel”, and you will be able to generate a new image just changing the color.
Selective Converting
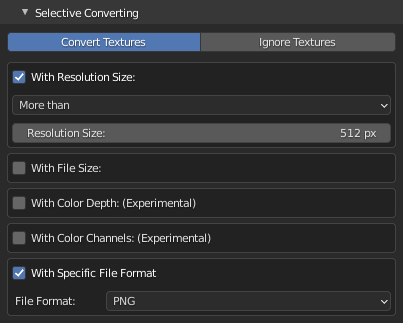
Selective Converting is a very useful feature if you have a huge scene with a lot of textures, and you want to convert textures only with specific properties.
It is very simple to use, just select the selective method:
Convert Textures: It will convert only textures with selected properties below.
Ignore Textures: It will Ignore textures with selected properties below.
If you don’t want any filters, just disable all
Critical Maps Detector
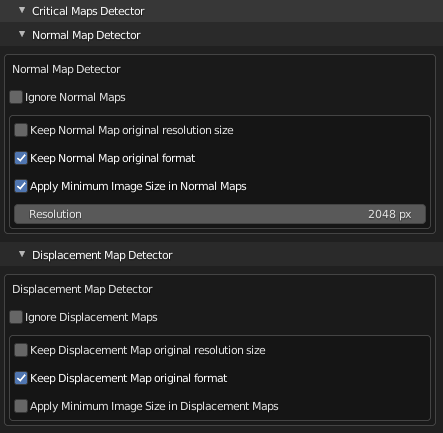
Some PBR maps cannot be converted or resized in the same way as other maps, here you will be able to deal with them.
Output Settings
A simple panel where you will be able to select the output folder of the textures, if you want the textures to be in the same blend file directory in the textures folder, just keep it checked.

Final Settings
Here is an important panel, where you will be able to change important settings of the conversion.
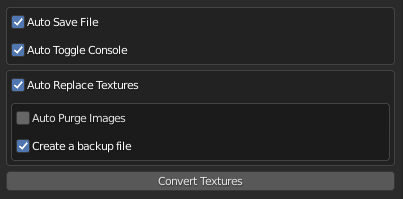
AutoSave File – Please always keep it active! for the conversion works as expected the blend file should be saved, because the conversion process will find only images that are saved in the blend file data, meaning that if you added a texture, and want to convert it, and the blend file does not have this texture saved in the file, the converter will not find it!
And when the file is saved before the converting, if you want to get back to your textures, you will be able to just re-open the file, and everything will get back to before the converting
Auto Toggle Console – With this option active, when the process starts, the console window will be opened. the console is the only place where you will be able to see the converting process because Blender will be frozen during the process
Note that if you are converting a lot of textures, Blender will be frozen until all the process is done, and the only way to cancel it is to force Blender to close.
In Blender, addons can only toggle on/off the console, meaning that if already have the console opened, if this option is active, the console will be closed. So keep in mind that the console should be closed before the conversion starts (or just uncheck the box and the console will not be toggle)
Auto Replace Textures – This is one of the most important options in the addon, if checked when the conversion is finished, the addon will automatically replace each node of the old textures. if you don’t want this to happen, just uncheck this box!
Auto Purge Images – With this option active, after finishing the replacing process. the addon will purge all images in the blend file.
If this option is not enabled, in a scene with 150 textures, if you convert all of these textures after the addon replaces all textures there will be 300 textures in your blend file, which will be deleted only when the blend file is closed.
Create Backup File – This is important if you want to get back to the version of the file before the converting and replacing process. a folder in the same original blend file will be created, and inside of it will be a blender file version before the replacing process, and you will be able to access it at any time!