To add your first EasyLight is very simple!
1 – Select your IES Texture (If you want to use a texture of your IES Library)
2 – Select a light group (For now you can keep the group input empty)
3 – Select the light type
And it’s done!
You will notice that a new group called “New Group” was created, and our first light is in this group.
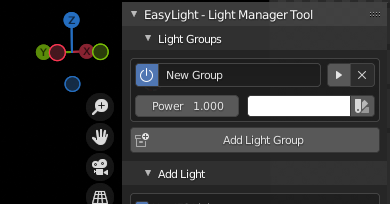
And you can already play with these group settings
In the next section, you will learn how these groups work!
Adding your Second EasyLight
For your second light, you can choose between adding this light to the “New Group”, or creating a new group for this light, in this example, we will be adding this second light to the “New Group” light group.
Now we have two lights in the same group, and we can control both lights within the same group settings
Adding a third light to another group
In this example, we will create a third easylight in a completely different new group.
To create a new group when adding a new light is very simple, in the group selection, just press the “X” to the group space to become empty, when is empty, it means that this light will be added in a new light group.
Now we have two light groups

And now we can control different lights in these groups individually! (Remember that we have two lights in the first group and only one light in the second group)
And don’t forget that you can easily rename them